Melting Milk Swirls

Melting Milk Swirls
This fun, colourful activity is easy to put together and looks gorgeous! It's a great way for your little ones to get creative with colours using something other than paints/crayons/pencils, etc. They will have so much fun creating bright little trails and swirls in the white milk. It's also a great way to demonstrate how ice melts when it's warmed up.

You only need three ingredients - milk, water and food dye. The hardest part is waiting for the ice to freeze.

This one held my 3yo's attention for about 20 minutes, so is definitely a winner in my books!

Ingredients

  • Water
  • Food dye - various colours
  • Warm milk
  • Container/baking tray to put the milk in
  • Ice cube trays

Method

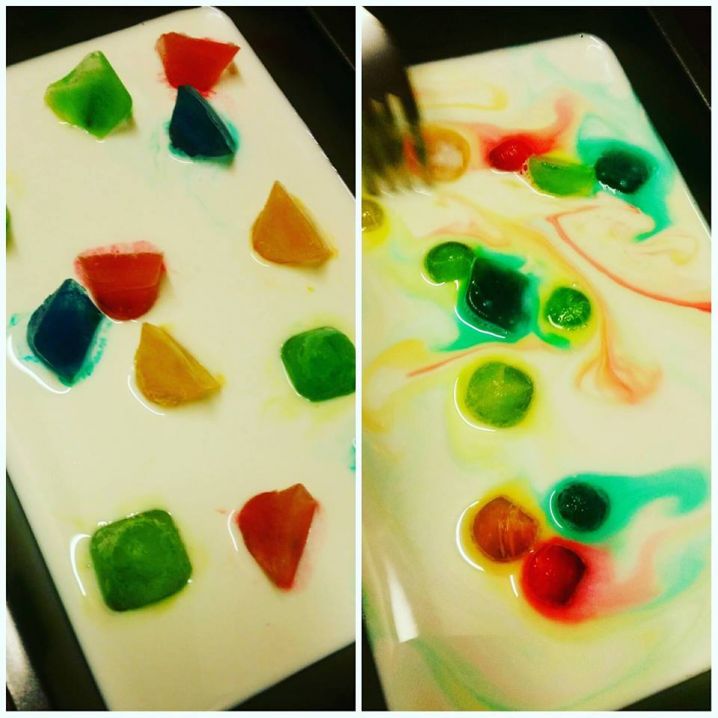
Mix up some coloured water in a couple of cups/glasses by adding a few drops of food dye to the water. Make as many colours as you like.

Pour coloured water into ice cube trays, freeze.

Once ice is frozen, warm up some milk and pour it into a container or tray. You don't need much, about a cm deep is fine.

Add ice cubes to the milk and use a fork/spoon to slowly move them around. As they melt in the warm milk they will leave pretty trails of bright colours! Your child can experiment with moving them faster and slower - slower gets the best result. See if you can make any cool patterns and shapes.


Comments

No comments

Leave a comment

Follow us on Facebook